Another great feature that is released within the Wave 2 2024 Release is the Work Assignment feature. This feature allows you to automate the process of leads and opportunities assignments based on different criteria. This can be a great way to assign high-priority leads, high-value opportunities, or perhaps opportunities from important customers to the right colleagues almost instantly.
Use case Padel Vamos
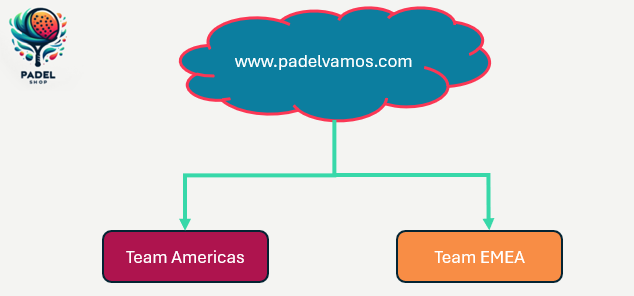
In this blog, I would like to explain how the Work Assignment feature can help you by using Padel Vamos company as a use case. The international company is the brand when it comes to the sports padel. The structure of the company is as follows:
- padelvamos.com is the main website of the company
- the website offers an enquiry form, which is on average generating between 300 – 500 leads per day.
- The way leads are being handled is in two teams, each responsible for a certain region:
- Team Americas, is responsible for leads coming from the United States
- Team EMEA, is responsible for leads from everywhere besides the United States
- member 1: Jeroen Scheper
- Specialty: Marketing and Equipment
- member 2: John King
- Specialty: Marketing
- member 1: Jeroen Scheper
Work assignment components
When you want to use work assignment to automate assignments of records, it is important to understand its key components.
- Segments; categorize/filter data based on criteria you define, think about region, source, and priority for example.
- Sequences; these are the steps that sales colleagues would follow as they progress records in the sales journey. Sequences are a big functionality on their own, therefore I will explain this in more detail in a future post.
- Assignment Rules; these are one or more conditions, that once met, will automate the assignment but will also specify what logic should be applied to assigning the records.
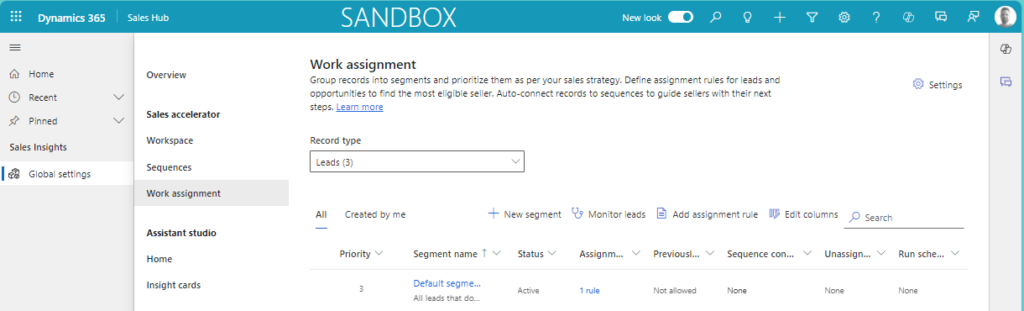
Configure Work assignments – Segments
In order to configure the feature Work assignments to automate assignments you need to:
- Open the Sales Hub app
- Change the area to Sales Insights settings
- Select Global settings
- From the overview, select Work assignment in the Sales Accelerator section
You have the option now, based on Record Type, to view the segments for either Leads or Opportunities. For both options, there is a default segment available already.
For adding a new segment you select + New segment from the ribbon and you need to define:
- Name of the segment: Leads EMEA
- Description
- Priority: 2 (this is important in cases when multiple segment criteria are met, the one with the highest priority will be used.
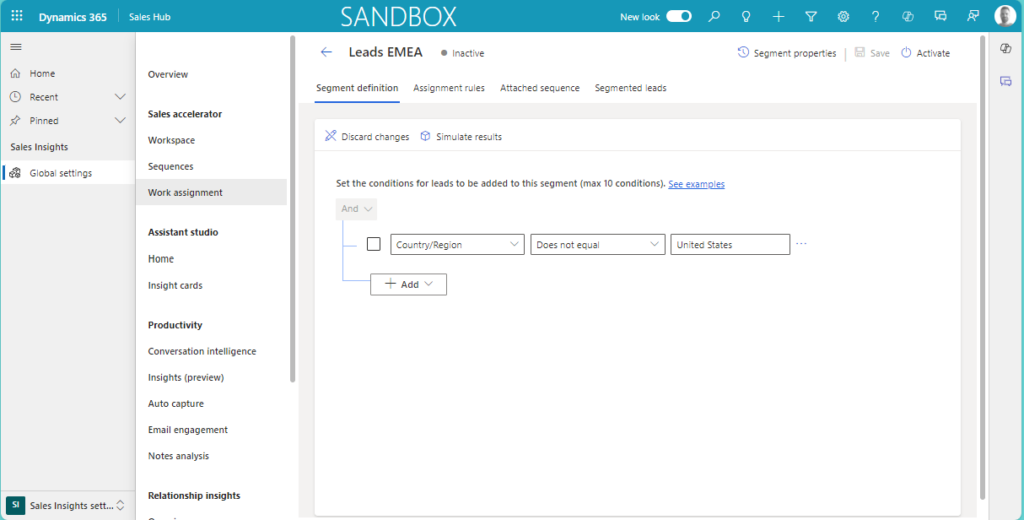
Since Team EMEA, as described in our use case, is responsible for all leads that are not coming from United Status we define the segment as shown below where we filter on Country. As mentioned before, this could be completely tailored to your needs, perhaps you want to use Lead Source, Industry, or maybe a Marketing Campaign or a combination to build your segments.
Work assignment – Assignment rules
The next step in the process of Work assignment to automate assignments is to define the Assignment rules, these are in essence the rules you put in place to automatically assign records to specific users or teams. On top of this, you can also determine how you want to distribute the records. Microsoft Learn documentation (complete notes can be found here) says the following about these options:
- Round robin: The records are distributed evenly in turn to sellers who are qualified to receive them based on the conditions of the assignment rule.
- Load balancing: Leads are distributed to sellers based on their workload, so that all sellers are equally busy.
In our use case, I did configure two Assignment rules:
- Rule EMEA – that rule will do a round robin for enquiries where the Request type is Equipment and check the skill attribute for this when assigning it to a seller
- Rule EMEA – that rule will do a round robin for all enquiries where the Request type does not equal Equipment
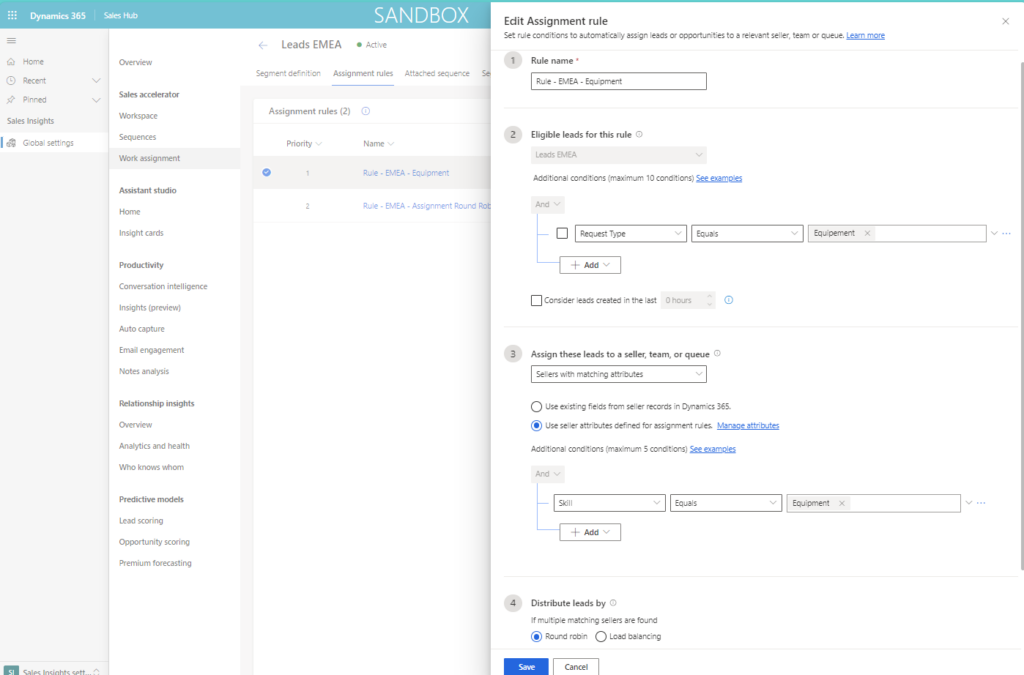
Assignment rule 1 – Equipment
- Rule Name: Rule – EMEA – Equipment
- Segment: Leads EMEA where the Request Type is Equipment.
- Use seller attributes and apply that Skill should be equal to Equipment
- Distribute by: Round Robin
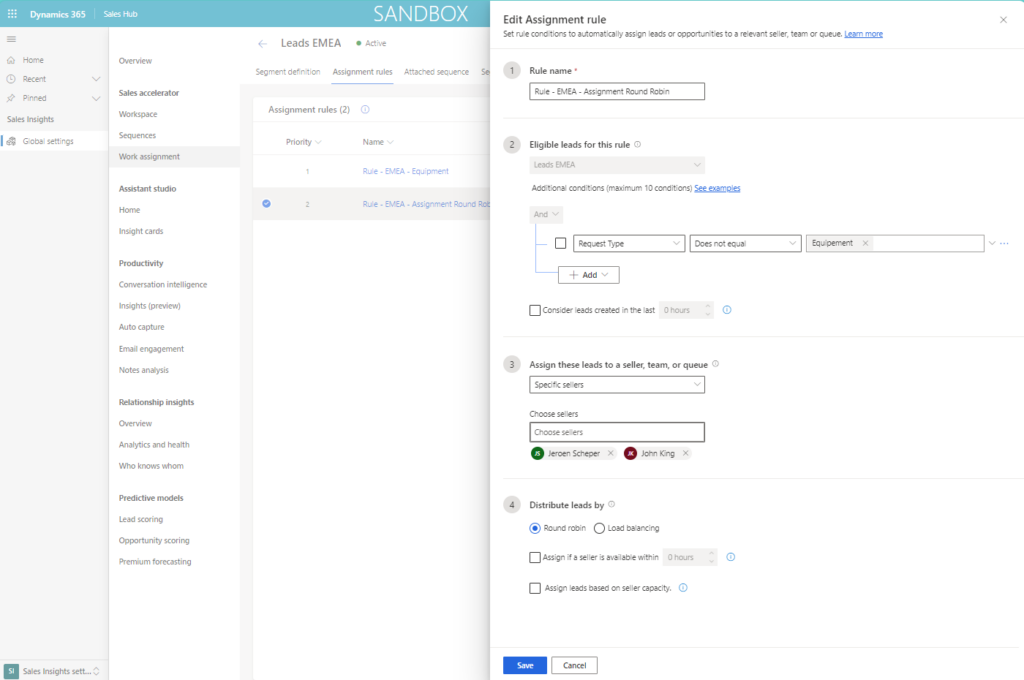
Assignment rule 2 – All other
- Rule Name: Rule – EMEA Assignment Round Robin
- Segment: Leads EMEA where the Request Type does not equal Equipment
- Assign Leads to: In the Team EMEA there are two colleagues (sellers): John King and Jeroen Scheper
- Distribute by: Round Robin
The last two options in the Distribute leads by section are optional:
- Assign if a seller is available within X hours; this would honor the work schedule of the colleague, think about working times but also Bank Holidays or time off, etc.
- Assign leads based on seller capacity; this would take into consideration the maximum number of open records that the colleague can have at any given time.
To manage capacity, availability, or other custom-defined attributes you can access these via the Settings button in the first overview screen. Interesting custom-defined attributes could be language, skills, or certifications for example. Microsoft has shared more interesting examples of how you could use custom-defined attributes that can help you automate the routing of records here.

Segmented records
As mentioned in the beginning, the sequence we skip for now and will explain this in more detail in a future post since this blog post is mainly focussing on the automated assignments. In the Segmented Leads section, you can see to which sellers (owner) the leads have been assigned to for that segment.
Assignments in action
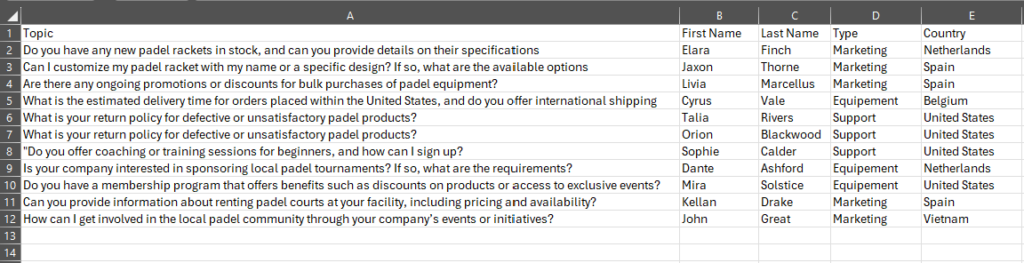
Before we can test the functionality we need to make sure the Work assignment is activated, you can do this by selecting the the segment and select: Activate. To test this functionality I have created a data file with enquiries that you can see below. This is to simulate the website with the enquiry form as mentioned in the beginning of this post. The Country column and Type column are important when it comes to work assignment to automate assignments as explained in the configuration above.
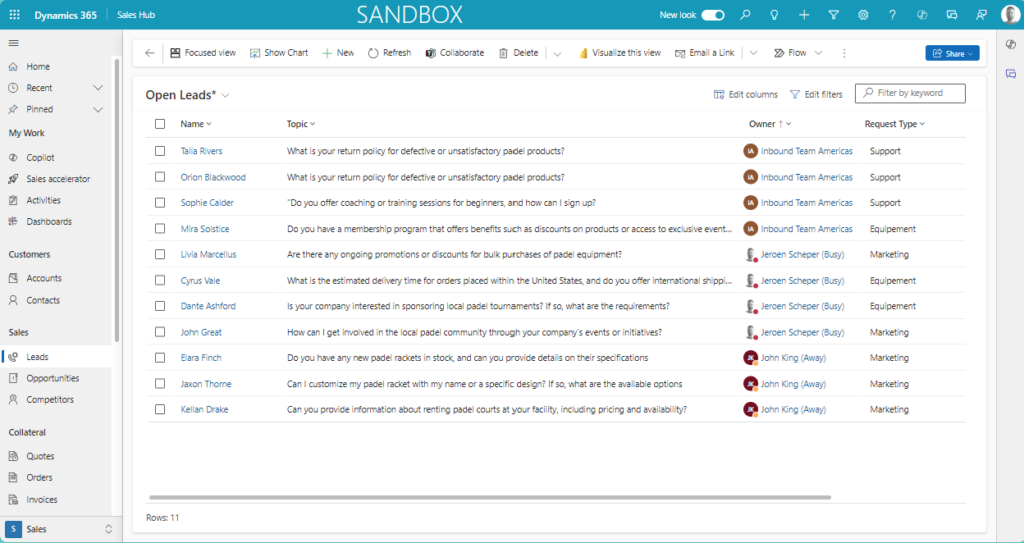
Once the data import is completed and assignments did take place this is the end result. I would like to explain to why I think this is correct:
- Enquiries that are not in the US and are of type Equipment, can only be assigned to Jeroen Scheper
- Enquiries that are not in the US and are not of type Equipement, can be assigned via Round Robin to John King and Jeroen Scheper
- Enquiries that are in the US, will be assigned to Inbound Team Americas
For a more holistic overview and cross segments and in case you want to see what rules are being used, you can check the Monitor Leads option in the home screen. This allows you to see which assignment rule is used to assign it to the owner.