
Microsoft has released a new awesome refreshed look to model-driven apps. The classic theming, where you were able to select a color by using a color picker, was user-friendly and allowed you to compare different themes quite easily. The new refreshed look allows you only to modify the colors that are being used in the app header. Hopefully, this will be extended soon, but also the way how to set this up could be a bit more user-friendly in order to get your awesome refreshed look for your app.
The New Look setting must be enabled in the header in order to use the awesome refreshed look for model-driven apps.

The following steps need to be taken in order to create an awesome and refreshed look:
1. Create a new solution
in the example below I have created a solution called: Apptheme.
2. Create a new web resource
Before you can create the actual web resource, a new XML file needs to be created. The following XML can be copied in and of course, change the attributes to the colors you like. Personally I just use Notepad in order to create these files but there are more sophisticated tools out there. At the moment the following attributes are “supported” (thank you Microsoft for providing an example here)
- background – Background color of the app header
- foreground – The text color of the app header
- backgroundHover – The background color of buttons on the app header when they’re hovered over
- foregroundHover – The text color of buttons on the app header when they’re hovered over
- backgroundPressed – The background color of buttons on the app header when they’re pressed
- foregroundPressed – The text color of buttons on the app header when they’re pressed.
- backgroundSelected – The background color of buttons on the app header when they’re selected.
- foregroundSelected – The text color of buttons on the app header when they’re selected.
I have changed the attributes to be the following and stored the XML file locally called: moderntheme.xml
<AppHeaderColors
  background="#0D98BA"
  foreground="#FFFFFF"
  backgroundHover="#008B8B"
  foregroundHover="#FFFFFF"
  backgroundPressed="#29AB87"
  foregroundPressed="#FFFFFF"
  backgroundSelected="#01796F"
  foregroundSelected="#FFFFFF"
/>
Now you need to create a new web resource in your solution by selecting: Web Resources > + New > More > Web resource

Provide a proper name and make sure the Type will be XML and select the xml file you created locally, in this example moderntheme.xml

3. Override App Setting
The last step will be to add the Setting: Override App Header color to your solution and link the custom web resource.
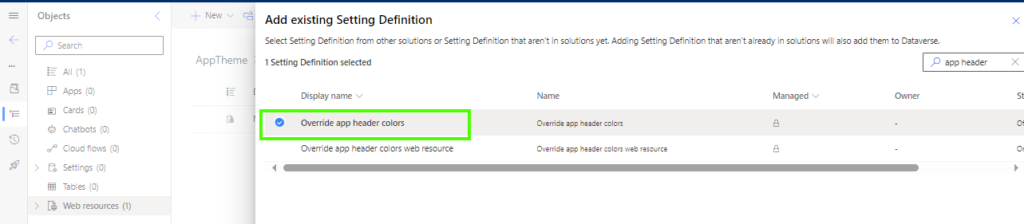
Select Add Existing > More > Setting from your solution.

Search for Override App Header color and add this setting to your solution.
Open the Override App Header color setting and update the value to the name of your web resource.
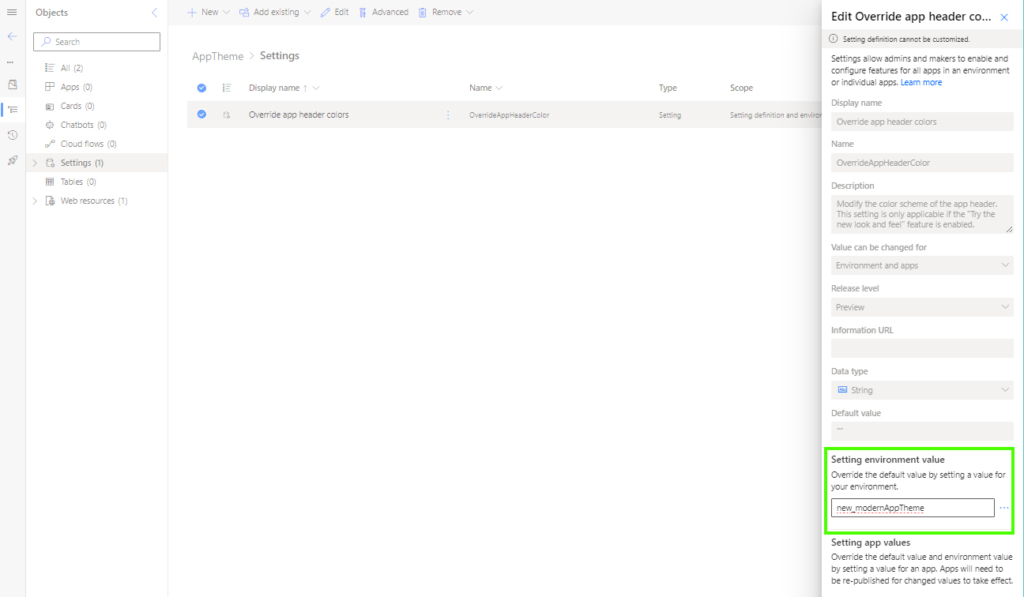
Once Saved and Published, the awesome refreshed look will be there 🙂


Have you found a way to change “SANDBOX”? Would love to be able to show “Development”, “Testing”, “Training”, etc.
Hi Dave,
Thank you for visiting my blog and for your reply first of all 🙂
I am not aware of a way that can override that.
According to me, this is dictated by the environment type:
https://learn.microsoft.com/en-us/power-platform/admin/environments-overview#power-platform-environment-types
If you do find a way of doing this, then please let me know!
Enjoy your day!
Jeroen
Hi Jeroen,
Great post, thanks!
Is there a way to add a logo as well?
Regards,
Marcel
Hi Marcel,
Thank you for visiting my blog, really appreciated!
At the moment the only way to include the logo is using the “current way” of managing colors is via Themes.
Within Customization > Themes > select the active theme and you will see an option at the top called Logo which will be a web resource.
Please let me know if you managed to follow the instructions.
Enjoy your day!
Jeroen